


Multi Bypass Tray for Sawgrass Printers
Regular price
$198.00
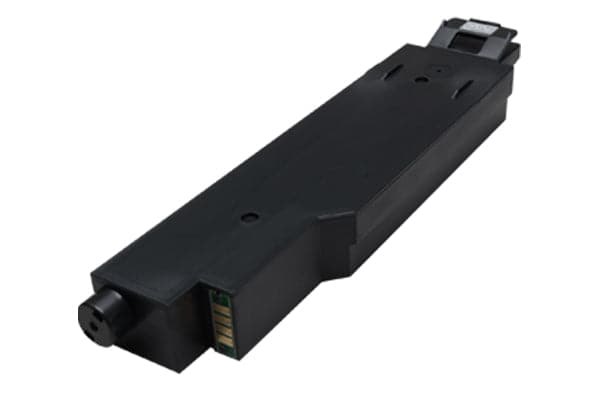
Multi Bypass tray allows your Ricoh sublimation printer to print slightly larger size papers. Choose your model from the list above
-
SG400/SG500 Bypass TrayThis additional, optional multi bypass tray allows your Sawgrass Virtuoso SG400/ SG500 dye-sublimation printer to print beyond 8.5" x 11" and up to 8.5" x 21” paper and longer. The multi bypass tray is attached to the back of the printer and offers an additional paper capacity of up to 100 sheets.
- Capacity: 100 sheets
- The width does not change for this model of printer.
-
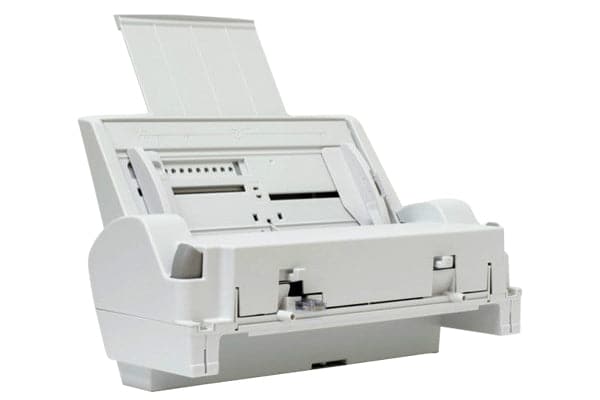
SG800/SG1000 Bypass Tray
This additional, optional multi bypass tray allows your Sawgrass Virtuoso SG800/ SG1000 dye-sublimation printer to print beyond 11" x 17" and up to 13" x 19" paper and longer. The multi bypass tray is attached to the back of the printer and offers an additional paper capacity of up to 100 sheets.
- Capacity: 100 sheets
- Accepted Paper Size:
- Letter (8.5" x 11")
- Legal (8.5" x 14")
- 11" x 17"
- 12" x 18"
- EXE (7.25" x 10.5")
- Half Letter (5.5" x 8.5")
- A3 (16.5" x 11.7")
- A4 (8.3" x 11.7")
- A5 (5.8" x 8.3")
- A6 (4.2" x 5.8")
- Acceptable Paper Weight: 13 67 lb. Bond/140 lb. Index (60 256 g/m)
Setting up your Bypass Tray
Before setup:
- Make sure the printer is off and unplugged
- Take the Bypass Tray out of the box and remove the tape
- Turn the printer off and unplug the printer
- Grab a coin. It will come in handy later we promise!
Setting Up SG400/SG500 Bypass Tray
- First go to the back of your printer, push in two gray tabs to slightly open the back.
- Now that the rear door is slightly opened, using your thumbs pull down the noise cancellation cover. This looks like little fan slots on the rear door.
- Close the rear door, making sure the gray tabs have clicked back in. The noise cancellation cover will look like an open flap.
Setting Up SG800/SG1000 Bypass Tray
- First go to the back of your printer, push in two gray tabs to slightly open the back.
- Now that the rear door is slightly opened, using your thumbs pull down the noise cancellation cover. This looks like little fan slots on the rear door.
- Close the rear door, making sure the gray tabs have clicked back in. The noise cancellation cover will look like an open flap.
- Now, grab the coin of your choice and coin screw to attach the L-shaped anti-topple stand to secure the bypass tray. This will help the tray stay in place while printing.
- To attach the bypass tray to your printer, press the two gray tabs on both sides of the bypass tray.
- While these are pushed down, fit, and push the bypass tray into the printer until it clicks.
- Make sure the gray tabs on the side of the bypass tray are pushed back out into their original position.
Tips
- Make sure to attach the bypass tray before turning the printer on if you bought the additional tray and printer at the same time.
- If the bypass tray does not “click in” try pushing down the gray buttons and moving it up and then to the left.
- Make sure to put 3-5 sheets of paper in the bypass tray so the printer can detect the paper!
| Unit Sell | |
|---|---|
| Category | Printer Accessories |
| Size | |
| Substrate | |
| Microwave Safe? | |
| Dishwasher Safe? | |
| Joto Recommended Shrink Sleeve/Film |
| Peel | |
|---|---|
| Equipment | |
| Image | |
| Mug Element | |
| Pressure | |
| Application Temperature | |
| Time | |
| Mug Press Imaging Instructions | |
| Convection Oven Instructions |